Dogs
Unleash the Fun: Creating DIY Dog Agility Courses for a Pawsome Time!
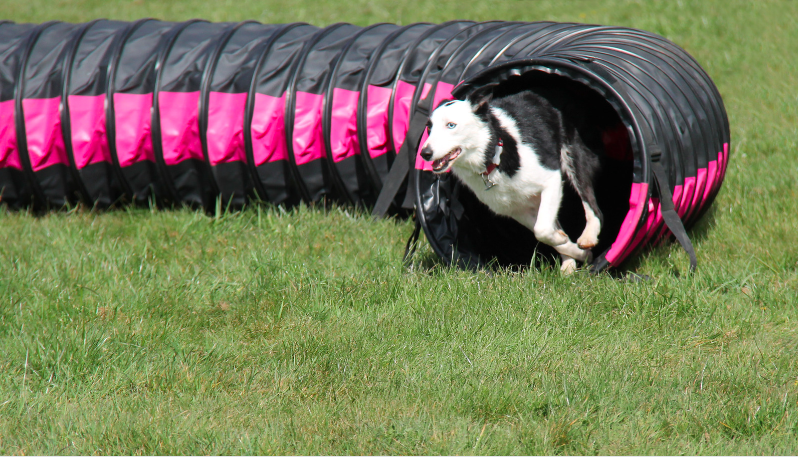
Unleash the Fun: Creating DIY Dog Agility Courses for a Pawsome Time!
Are you ready to take your dog’s playtime to the next level? Welcome to the exciting world of DIY dog agility courses!
In this comprehensive guide, we’ll walk you through everything you need to know to create a thrilling and challenging agility course for your furry friend.
Get ready to watch your dog jump, weave, and dash through an obstacle course that will keep tails wagging and hearts racing.
Getting Started: Why DIY Dog Agility Courses?
Creating a DIY dog agility course is an exciting endeavor, but before you dive into the construction and training, it’s essential to understand the compelling reasons why you should embark on this journey.

The Bonding Experience
Agility training isn’t just about teaching your dog to navigate obstacles; it’s a shared experience that strengthens the bond between you and your furry friend. Here’s how:
1. Trust and Communication: Through agility training, you and your dog will learn to trust each other. Your dog will look to you for cues and guidance, while you’ll gain a deeper understanding of their behavior and needs.
2. Teamwork: Agility is all about teamwork. You and your dog will work together to overcome obstacles, fostering a sense of partnership and cooperation.
3. Quality Time: In today’s busy world, spending quality time with your dog is precious. Agility training offers dedicated one-on-one time to strengthen your relationship.
Mental and Physical Stimulation
Dogs, regardless of their breed, age, or size, need both mental and physical stimulation to stay happy and healthy. DIY dog agility courses provide the perfect solution:
1. Mental Exercise: Agility training challenges your dog’s mind. They must learn to navigate the course efficiently, which requires problem-solving and quick decision-making.
2. Physical Workout: The agility course offers an excellent physical workout. It helps build strength, improve endurance, and maintain a healthy weight, reducing the risk of obesity-related health issues.
3. Energy Release: Many dogs have excess energy to burn, and agility courses provide a structured way to channel that energy, preventing boredom and destructive behavior.
Cost-Effective
While commercial agility courses can be expensive, DIY dog agility courses offer a cost-effective alternative. Here’s why creating your own agility course is a budget-friendly choice:
1. Customization: When you build your course, you have complete control over its design. You can tailor it to your dog’s size, abilities, and training goals.
2. Affordable Materials: Many agility course obstacles can be constructed using readily available, inexpensive materials such as PVC pipes, connectors, and basic tools.
3. Reusability: Once you’ve built your course, you can use it repeatedly without additional costs, making it a long-term investment in your dog’s well-being.
In conclusion, DIY dog agility courses offer a fantastic way to bond with your canine companion, provide them with both mental and physical exercise, and do so without breaking the bank.
It’s a rewarding experience that will not only keep your dog entertained but also strengthen your relationship and promote their overall well-being. So, grab your tools and get ready to embark on this pawsome adventure!
DIY Dog Agility Course Design
Designing your DIY dog agility course is a crucial step in providing your furry friend with an engaging and challenging experience. Here, we’ll delve into the key aspects of designing a course that suits your dog’s abilities and ensures safety.

Selecting a Location
The first step in creating your dog’s agility course is selecting the right location. Consider the following factors when choosing a spot:
1. Space: Opt for a spacious area, preferably a backyard or a nearby park, where you can set up your course. Ensure there’s enough room for all the planned obstacles without overcrowding the area.
2. Safety: Safety should be your top priority. Remove any hazards such as sharp objects, toxic plants, or other potential dangers. Make sure there are no obstacles that could injure your dog during the agility training.
3. Accessibility: Your chosen location should be easily accessible, allowing you and your dog to reach it conveniently. This accessibility will encourage regular training sessions.
Basic Equipment
To create an effective DIY dog agility course, you’ll need to gather essential equipment. The basics include:
1. Jump Hurdles: Jump hurdles are a staple of agility courses. You can purchase adjustable jump hurdles or make them using PVC pipes, connectors, and jump cups. This flexibility allows you to adapt the height of the jumps to your dog’s capabilities.
2. Tunnels: Tunnels add an element of excitement to the course. Construct them using flexible drainage pipes and PVC pipe connectors. These tunnels are lightweight and can be adjusted to create curves and turns.
3. Weave Poles: Weave poles are a challenging but enjoyable obstacle. Create these by inserting PVC pipes into the ground and sliding flat plastic slats through them at regular intervals. Adjust the spacing to match your dog’s skill level.
4. Pause Table: The pause table is a resting spot for your dog to catch their breath between challenges. It can be as simple as a square of plywood supported by sturdy legs. Make sure it’s at the right height for your dog to comfortably jump onto.
Customization
One of the benefits of designing your DIY dog agility course is the ability to customize it to your dog’s needs and abilities. Here’s how you can tailor the course:
1. Size and Height: Adjust the size and height of obstacles to match your dog’s size and breed. Smaller dogs will need lower hurdles and narrower weave poles, while larger dogs can handle more substantial challenges.
2. Complexity: Start with straightforward obstacles and gradually introduce more complex ones as your dog becomes comfortable. This gradual progression ensures that your dog doesn’t become overwhelmed and can safely build their skills.
3. Add Variety: Keep your dog engaged by changing the course periodically. You can rearrange obstacles or introduce new challenges to prevent boredom.
In conclusion, the key to a successful DIY dog agility course lies in the design. The location, equipment selection, and customization are crucial elements that ensure a safe and engaging experience for your dog.
By carefully considering these factors, you’ll be on your way to creating a course that will provide hours of fun and mental stimulation for your furry friend.
Building the Obstacles
Creating the obstacles for your DIY dog agility course is a fun and rewarding part of the process. Here, we’ll dive into the details of constructing each obstacle, from jump hurdles to weave poles, providing you with step-by-step guidance.

Jump Hurdles
Jump hurdles are a classic and exciting obstacle in any agility course. Building adjustable jump hurdles is relatively straightforward. Here’s how:
Materials:
- PVC pipes (for the uprights and crossbar)
- PVC connectors
- Jump cups
- Measuring tape
- Saw (for cutting PVC pipes)
Construction:
- Measure the desired width of the hurdle’s crossbar. For beginners, you can start with a lower height (around 4-8 inches) and adjust it as your dog progresses.
- Cut two equal lengths of PVC pipes for the uprights. The height of the uprights will depend on your dog’s size and training level, typically ranging from 12 to 24 inches for smaller dogs and 20 to 30 inches for larger dogs.
- Attach PVC connectors to the bottom of each upright. This will create a stable base for the hurdle.
- Slide the crossbar through the jump cups and adjust the height as needed. The jump cups allow you to raise or lower the crossbar easily.
- Place the jump hurdles at appropriate intervals within your agility course.
Tunnels
Tunnels provide an element of excitement and challenge to your dog’s agility course. Creating a tunnel is cost-effective and can be customized to your space. Here’s how to do it:
Materials:
- Flexible drainage pipes (choose the diameter based on your dog’s size)
- PVC pipes
- PVC connectors
- Measuring tape
- Saw (for cutting PVC pipes)
Construction:
- Determine the length of your tunnel based on the available space and your dog’s comfort level. An 8 to 12-foot tunnel is a good starting point.
- Cut the flexible drainage pipe to the desired length. If you want to create curves or turns in the tunnel, consider using connectors to achieve the desired shape.
- Attach PVC pipes to each end of the tunnel for stability.
- Place the tunnel within your course, ensuring that it is securely anchored to prevent movement during your dog’s runs.
Weave Poles
Weave poles require some precision to ensure that your dog can navigate them effectively. Here’s how to build them:
Materials:
- PVC pipes (for the poles)
- PVC connectors
- Flat plastic slats
- Measuring tape
- Saw (for cutting PVC pipes)
Construction:
- Measure and cut PVC pipes into the desired length for your weave poles. Typically, each pole should be around 3 feet long.
- Insert the PVC poles into the ground, evenly spaced, using connectors to create a stable base.
- Slide flat plastic slats through the PVC poles, leaving enough space for your dog to weave through comfortably. The spacing between poles should be adjusted according to your dog’s size and skill level.
- Ensure that the weave poles are securely anchored to the ground to prevent any movement during your dog’s training.
Pause Table
The pause table provides your dog with a resting spot during their agility run. Here’s how to construct one:
Materials:
- Plywood (for the table surface)
- Sturdy legs or supports
- Measuring tape
- Screws and a screwdriver
Construction:
- Cut a square or rectangular piece of plywood to create the table surface. The size can vary based on your dog’s size, but a 3×3-foot table is a common choice.
- Attach sturdy legs or supports to the underside of the table surface. Make sure the legs are of an appropriate height for your dog to comfortably jump onto the table.
- Place the pause table within your course, ensuring that it’s stable and secure.
In conclusion, building the obstacles for your DIY dog agility course can be a rewarding and creative endeavor.
By following these step-by-step instructions, you can construct jump hurdles, tunnels, weave poles, and a pause table that are tailored to your dog’s size and abilities.
These obstacles will provide a challenging and fun experience for your furry friend, promoting physical and mental stimulation while strengthening your bond.
Training and Safety
Once you’ve designed and built the obstacles for your DIY dog agility course, the next crucial step is training your dog and ensuring their safety throughout the agility experience.
Here, we’ll explore training techniques and safety measures to create a positive and secure environment for your furry friend.
Safety First
Safety should always be your top priority when engaging in agility training with your dog. Here are some essential safety measures to keep in mind:
1. Regular Equipment Inspection: Before each training session, thoroughly inspect the agility equipment for any signs of wear, damage, or loose parts. Ensure that all screws and connections are secure. Any compromised equipment should be repaired or replaced immediately.
2. Supervision: Never leave your dog unattended during agility training. You should be present to guide them through the course, provide cues, and ensure their well-being.
3. Age and Health: Agility training is physically demanding. Make sure your dog is old enough and healthy enough to participate. Consult your veterinarian for guidance, especially if your dog has pre-existing health conditions.
4. Gradual Progression: Introduce new obstacles gradually. Start with basic challenges and progressively increase the difficulty level as your dog gains confidence and skill.
5. Positive Reinforcement: Always use positive reinforcement techniques during training. Reward your dog with treats, praise, and affection when they successfully complete an obstacle. This positive feedback encourages your dog’s cooperation and enthusiasm.
Training Techniques
Training your dog for agility courses involves more than just teaching them to navigate obstacles. It’s about building trust, communication, and teamwork. Here’s how to train your dog effectively:
1. Basic Commands: Ensure that your dog is familiar with essential commands like “sit,” “stay,” “come,” and “leave it.” These commands are the foundation of agility training, helping you control your dog during the course.
2. Positive Reinforcement: As mentioned earlier, positive reinforcement is key. When your dog successfully completes an obstacle or follows a command, reward them immediately with treats or praise. This positive feedback reinforces their behavior.
3. Clicker Training: Some agility trainers use clicker training to mark desired behaviors. A clicker can help your dog understand precisely when they’ve done something right, making the learning process more efficient.
4. Patience and Consistency: Be patient and consistent in your training efforts. Dogs learn at different paces, so don’t get discouraged if progress is slow. Consistent training sessions and a calm demeanor will yield better results.
5. Trial Runs: Allow your dog to practice individual obstacles before running the entire course. This helps them build confidence and ensures they understand each obstacle’s purpose.
6. Stay Calm: Dogs are highly attuned to their owner’s emotions. Stay calm and positive during training sessions, as nervousness or frustration can affect your dog’s performance and confidence.
Start Slow
When introducing your dog to agility training, start with straightforward obstacles and gradually add complexity. Here’s a suggested progression:
1. Jumps: Begin with jump hurdles set at a low height. Gradually increase the height as your dog gains confidence.
2. Tunnels: Start with a straight tunnel, then add gentle curves and turns. Ensure your dog is comfortable before moving on to more challenging configurations.
3. Weave Poles: Begin with a few widely spaced weave poles and then reduce the distance between them as your dog improves their weaving skills.
4. Pause Table: Teach your dog to jump onto the pause table and remain there for a few seconds. Increase the duration of the pause as they become more comfortable.
In conclusion, training your dog for agility courses requires patience, consistency, and a strong focus on safety.
By following these training techniques and safety measures, you’ll create a positive and secure environment for your furry friend to enjoy their agility experience.
As you work together to overcome obstacles and build trust, you’ll find that agility training strengthens your bond and provides your dog with mental and physical stimulation.
Conclusion
In the world of DIY dog agility courses, you’ve embarked on an exciting journey filled with boundless fun and meaningful experiences with your furry companion.
This adventure is about more than just navigating obstacles; it’s a testament to the unique bond you share with your dog. As we wrap up this guide, let’s recap the highlights of what you’ve learned.
A Journey of Bonding
Agility training is not just a physical activity; it’s an opportunity to strengthen the trust and communication between you and your dog.
The teamwork required to conquer each obstacle enhances the connection you share. Spending quality time together during training sessions fosters a profound partnership that’s deeply rewarding.
Mental and Physical Stimulation
Your dog, regardless of their breed or age, craves both mental and physical stimulation. Agility training provides the ideal combination of these two essential elements.
It challenges your dog’s intellect, problem-solving skills, and quick decision-making while also offering a rigorous physical workout. By keeping their body and mind engaged, you prevent boredom and promote their overall well-being.
Budget-Friendly Adventures
Creating your DIY dog agility course doesn’t require deep pockets. Instead, it invites creativity and resourcefulness. The ability to customize your course to your dog’s size and abilities not only ensures a tailor-made experience but also keeps costs down.
By repurposing materials and using readily available items, you can keep your agility adventure budget-friendly.
Safety and Training
Safety is paramount in any agility training regimen. Regularly inspect your equipment for signs of wear and potential hazards, and never leave your dog unsupervised during training sessions.
Start your training journey with essential commands, use positive reinforcement techniques, and progress gradually to increase your dog’s confidence and skills. Your patience, consistency, and calm demeanor will be the building blocks of success.
So, as you prepare to embark on your DIY dog agility course adventure, remember that this experience is about more than just constructing obstacles and guiding your dog through them.
It’s about creating memories, strengthening your bond, and enhancing the well-being of your beloved pet.
Now, take what you’ve learned and build a course that challenges your dog, provides a wealth of mental and physical benefits, and, most importantly, brings joy and happiness to both of you.
Your dog’s tail will wag with excitement, and your heart will swell with pride as you watch them leap, dash, and conquer their way to a happier and healthier life.
Questions People Also Ask: (FAQs)
How much space do I need for a DIY dog agility course?
Ideally, you should have a spacious backyard or a park area. A 20×40 feet space is suitable for a basic agility course.
Can I create agility equipment from household items?
Yes, you can use PVC pipes, pool noodles, and other household items to make DIY agility equipment.
How can I ensure my dog’s safety during agility training?
Regularly inspect equipment for any hazards, supervise your dog, and use positive reinforcement techniques.
Are certain dog breeds better suited for agility training?
While any breed can enjoy agility, some breeds, like Border Collies and Shelties, tend to excel due to their natural agility and intelligence.
What are the basic commands my dog should know for agility training?
Your dog should be familiar with commands like “sit,” “stay,” “come,” and “leave it.” Training them to respond to these commands is crucial for agility training.
Now you’re well-equipped to embark on your DIY dog agility course adventure. Happy training, and may your furry friend leap, dash, and weave their way to joy!
We appreciate you for taking the time to read this article!
Finally, we hope you found this article interesting? And what do you think about ”Unleash the Fun: Creating DIY Dog Agility Courses for a Pawsome Time!!?”
Please feel free to share or inform your friends about this article and this site, thanks!
And let us know if you observe something that isn’t quite right.
Dogs
Exploring the Diverse World of Dog Breeds: A Look at the Seven Main Groups + the others
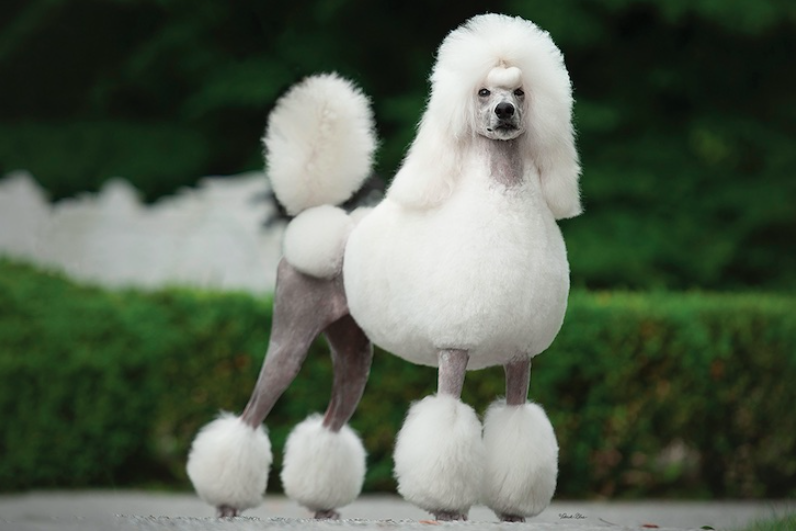
Exploring the Diverse World of Dog Breeds: A Look at the Seven Main Groups + the others
Dogs are one of the most diverse species on the planet, with hundreds of different breeds that vary widely in size, shape, temperament, and behavior. To help organize this diversity, dog breeds are often grouped into categories based on their original purpose or characteristics.
These groups, recognized by kennel clubs and breed organizations worldwide, provide a framework for understanding the different types of dogs and their typical traits. Here are the main groups of dogs:
- Sporting Group: These dogs were bred for hunting game birds, both on land and in the water. They are known for their stamina, intelligence, and willingness to please. Breeds in this group include the Labrador Retriever, Golden Retriever, and English Springer Spaniel.
- Hound Group: Hounds are known for their keen sense of smell and ability to track prey. They are often used for hunting and tracking game. Breeds in this group include the Beagle, Bloodhound, and Greyhound.
- Working Group: Dogs in this group were bred for specific tasks, such as guarding property, pulling sleds, or performing water rescues. They are known for their strength, intelligence, and trainability. Breeds in this group include the Siberian Husky, Boxer, and Great Dane.
- Terrier Group: Terriers were originally bred to hunt and kill vermin. They are known for their feisty and energetic nature. Breeds in this group include the Jack Russell Terrier, Bull Terrier, and Scottish Terrier.
- Toy Group: Toy breeds are small companion dogs that were bred for their portable size and charming personalities. They are often kept as lap dogs or companions. Breeds in this group include the Chihuahua, Pomeranian, and Shih Tzu.
- Non-Sporting Group: This group is a diverse collection of breeds that don’t fit into other categories. They vary widely in size, coat type, and temperament. Breeds in this group include the Bulldog, Poodle, and Dalmatian.
- Herding Group: These dogs were bred to control the movement of other animals, such as sheep or cattle. They are known for their intelligence, agility, and strong herding instincts. Breeds in this group include the Border Collie, Australian Shepherd, and German Shepherd Dog.
Each group has its own unique characteristics and traits, but all dogs share a common bond with humans as loyal companions and working partners. Understanding these groups can help you choose a breed that fits your lifestyle and preferences.
Sporting Group
- American Water Spaniel
- Boykin Spaniel
- Chesapeake Bay Retriever
- Clumber Spaniel
- Curly-Coated Retriever
- English Setter
- Flat-Coated Retriever
- Gordon Setter
- Irish Red and White Setter
- Irish Setter
- Irish Water Spaniel
- Nova Scotia Duck Tolling Retriever
- Pointer
- Spinone Italiano
- Sussex Spaniel
- Vizsla
- Weimaraner
- Welsh Springer Spaniel
- Wirehaired Pointing Griffon
Hound Group
- Afghan Hound
- American English Coonhound
- American Foxhound
- Basenji
- Black and Tan Coonhound
- Borzoi
- Cirneco dell’Etna
- Finnish Spitz
- Grand Basset Griffon Vendéen
- Greyhound
- Harrier
- Ibizan Hound
- Norwegian Elkhound
- Otterhound
- Petit Basset Griffon Vendéen
- Pharaoh Hound
- Plott
- Portuguese Podengo
- Redbone Coonhound
- Rhodesian Ridgeback
- Saluki
- Scottish Deerhound
- Sloughi
- Treeing Walker Coonhound
- Whippet
Working Group
- Akita
- Alaskan Malamute
- Anatolian Shepherd Dog
- Bernese Mountain Dog
- Black Russian Terrier
- Boerboel
- Boxer
- Bullmastiff
- Cane Corso
- Dogo Argentino
- Dogue de Bordeaux
- Greater Swiss Mountain Dog
- Great Pyrenees
- Komondor
- Kuvasz
- Leonberger
- Mastiff
- Neapolitan Mastiff
- Newfoundland
- Rottweiler
- Samoyed
- Siberian Husky
- St. Bernard
- Tibetan Mastiff
Terrier Group
- Airedale Terrier
- American Staffordshire Terrier
- Australian Terrier
- Bedlington Terrier
- Border Terrier
- Bull Terrier
- Cairn Terrier
- Cesky Terrier
- Dandie Dinmont Terrier
- Glen of Imaal Terrier
- Irish Terrier
- Kerry Blue Terrier
- Lakeland Terrier
- Manchester Terrier
- Miniature Bull Terrier
- Miniature Schnauzer
- Norfolk Terrier
- Norwich Terrier
- Parson Russell Terrier
- Russell Terrier
- Scottish Terrier
- Sealyham Terrier
- Skye Terrier
- Smooth Fox Terrier
- Soft Coated Wheaten Terrier
- Staffordshire Bull Terrier
- Welsh Terrier
- West Highland White Terrier
- Wire Fox Terrier
Toy Group
- Affenpinscher
- Brussels Griffon
- Cavalier King Charles Spaniel
- Chihuahua
- Chinese Crested
- English Toy Spaniel
- Havanese
- Italian Greyhound
- Japanese Chin
- Maltese
- Manchester Terrier (Toy)
- Miniature Pinscher
- Papillon
- Pekingese
- Pomeranian
- Poodle (Toy)
- Pug
- Shih Tzu
- Silky Terrier
- Toy Fox Terrier
- Yorkshire Terrier
Non-Sporting Group
- American Eskimo Dog
- Bichon Frise
- Boston Terrier
- Bulldog
- Chinese Shar-Pei
- Chow Chow
- Dalmatian
- Finnish Spitz
- French Bulldog
- Keeshond
- Lhasa Apso
- Lowchen
- Norwegian Lundehund
- Poodle (Miniature)
- Schipperke
- Shiba Inu
- Tibetan Spaniel
- Tibetan Terrier
- Xoloitzcuintli
Herding Group
- Australian Cattle Dog
- Australian Shepherd
- Bearded Collie
- Belgian Malinois
- Belgian Sheepdog
- Belgian Tervuren
- Border Collie
- Bouvier des Flandres
- Briard
- Canaan Dog
- Cardigan Welsh Corgi
- Collie (Rough)
- Collie (Smooth)
- German Shepherd Dog
- Icelandic Sheepdog
- Miniature American Shepherd
- Norwegian Buhund
- Old English Sheepdog
- Pembroke Welsh Corgi
- Polish Lowland Sheepdog
- Puli
- Pyrenean Shepherd
- Shetland Sheepdog
- Spanish Water Dog
- Swedish Vallhund
Miscellaneous Class
- American Hairless Terrier
- Barbet
- Biewer Terrier
- Boerboel
- Coton de Tulear
- Czechoslovakian Vlcak
- Lagotto Romagnolo
- Mudi
- Nederlandse Kooikerhondje
- Peruvian Inca Orchid
- Portuguese Podengo
- Rat Terrier
- Russian Toy
- Sloughi
- Thai Ridgeback
- Xoloitzcuintli
Rare Breeds
- Azawakh
- Bergamasco
- Chinook
- Cirneco dell’Etna
- Dandie Dinmont Terrier
- Finnish Lapphund
- Finnish Spitz
- Grand Basset Griffon Vendéen
- Kooikerhondje
- Lagotto Romagnolo
- Lowchen
- Norwegian Lundehund
- Otterhound
- Peruvian Inca Orchid
- Schipperke
- Sealyham Terrier
- Skye Terrier
- Sussex Spaniel
- Swedish Vallhund
- Tibetan Mastiff
Designer and Hybrid Breeds
- Labradoodle (Labrador Retriever + Poodle)
- Goldendoodle (Golden Retriever + Poodle)
- Cockapoo (Cocker Spaniel + Poodle)
- Pomsky (Pomeranian + Husky)
- Maltipoo (Maltese + Poodle)
- Cavapoo (Cavalier King Charles Spaniel + Poodle)
- Yorkipoo (Yorkshire Terrier + Poodle)
- Sheepadoodle (Old English Sheepdog + Poodle)
- Bernedoodle (Bernese Mountain Dog + Poodle)
- Aussiedoodle (Australian Shepherd + Poodle)
- Shih-Poo (Shih Tzu + Poodle)
- Boxerdoodle (Boxer + Poodle)
- Schnoodle (Schnauzer + Poodle)
- Chorkie (Chihuahua + Yorkshire Terrier)
- Puggle (Pug + Beagle)
- Cockapoo (Cocker Spaniel + Poodle)
- Labradoodle (Labrador Retriever + Poodle)
- Goldendoodle (Golden Retriever + Poodle)
- Cockapoo (Cocker Spaniel + Poodle)
- Pomsky (Pomeranian + Husky)
- Maltipoo (Maltese + Poodle)
- Cavapoo (Cavalier King Charles Spaniel + Poodle)
- Yorkipoo (Yorkshire Terrier + Poodle)
- Sheepadoodle (Old English Sheepdog + Poodle)
- Bernedoodle (Bernese Mountain Dog + Poodle)
- Aussiedoodle (Australian Shepherd + Poodle)
- Shih-Poo (Shih Tzu + Poodle)
- Boxerdoodle (Boxer + Poodle)
- Schnoodle (Schnauzer + Poodle)
- Chorkie (Chihuahua + Yorkshire Terrier)
- Puggle (Pug + Beagle)
Rare and Uncommon Breeds
- Bergamasco Shepherd
- Catahoula Leopard Dog
- Chinook
- Finnish Spitz
- Glen of Imaal Terrier
- Kooikerhondje
- Lagotto Romagnolo
- Mudi
- Otterhound
- Peruvian Inca Orchid
- Portuguese Podengo
- Pyrenean Shepherd
- Russian Toy
- Saluki
- Sloughi
- Swedish Vallhund
- Tibetan Mastiff
- Toy Fox Terrier
- Xoloitzcuintli
Conclusion
In conclusion, the world of dogs is incredibly diverse, with hundreds of breeds that vary widely in size, shape, temperament, and behavior. To help categorize this diversity, dog breeds are grouped into categories based on their original purpose or characteristics.
These groups, such as the Sporting Group, Hound Group, Working Group, Terrier Group, Toy Group, Non-Sporting Group, and Herding Group, provide a framework for understanding the different types of dogs and their typical traits.
Each group has its own unique characteristics and traits, but all dogs share a common bond with humans as loyal companions and working partners. Whether you’re looking for a hunting companion, a family pet, a working dog, or a lap dog, there’s a breed out there for everyone.
Understanding these groups can help you choose a breed that fits your lifestyle and preferences, ensuring a happy and fulfilling relationship between you and your canine companion.
Frequently Asked Questions (FAQs)
What are some breeds in the Sporting Group, and what are their typical characteristics?
Some breeds in the Sporting Group include the Labrador Retriever, Golden Retriever, and English Springer Spaniel. These breeds are known for their high energy levels, intelligence, and friendly nature. They are often used for hunting and retrieving game.
Which breeds are typically found in the Hound Group, and what sets them apart from other groups?
The Hound Group includes breeds such as the Beagle, Bloodhound, and Greyhound. Hounds are known for their keen sense of smell and ability to track prey. They are often used for hunting and tracking game.
What are some examples of breeds in the Working Group, and what are their common characteristics?
Breeds in the Working Group include the Siberian Husky, Boxer, and Great Dane. These dogs were bred for specific tasks, such as guarding property or pulling sleds. They are known for their strength, intelligence, and trainability.
Can you name a few breeds from the Terrier Group, and what makes them unique?
Terriers, such as the Jack Russell Terrier, Bull Terrier, and Scottish Terrier, were originally bred to hunt and kill vermin. They are known for their feisty nature and high energy levels.
What are some breeds in the Toy Group, and what role do they typically play in households?
The Toy Group includes breeds like the Chihuahua, Pomeranian, and Shih Tzu. These breeds are small in size and are often kept as lap dogs or companions. They are known for their portable size and charming personalities.
We appreciate you for taking the time to read this article!
Finally, we hope you found this article interesting? And what do you think about ”Exploring the Diverse World of Dog Breeds: A Look at the Seven Main Groups!?”
Please feel free to share or inform your friends about this article and this site, thanks!
And let us know if you observe something that isn’t quite right.
Dogs
Comprehensive List of Essential Whelping Kit Items
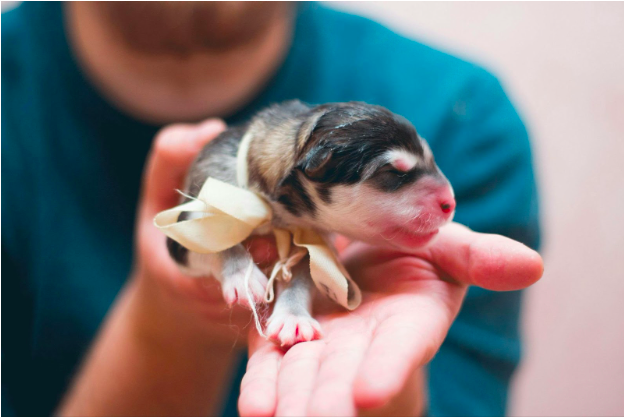
Comprehensive List of Essential Whelping Kit Items
If you’re just making your start as a dog breeder, you’ve likely got a lot of things on your mind. Finding a suitable mate for your dog, getting them tested—there’s a lot of mental and physical effort that goes into breeding responsibly. One way to make things easier for yourself is assembling your whelping kit early. A whelping kit contains all the necessary items to assist a mother dog during labour and ensure the safe delivery of her puppies.
For both experienced breeders and first-time pet owners, assembling a comprehensive whelping kit can make a significant difference in managing the birthing process. Having everything on-hand is a good idea, as you don’t want to suddenly be stuck without essential items in the midst of delivery.
Comprehensive List of Essential Whelping Kit Items
-
Whelping Box
The first and most crucial item is the whelping box. This is where the mother dog will give birth and care for her puppies during their first weeks of life. It should be spacious enough for the mother to move comfortably but with walls high enough to safely contain the newborn puppies.
-
Clean Towels and Blankets
You’ll need several clean towels to help dry puppies immediately after birth, which stimulates them to breathe and keeps them warm. Soft blankets can be used to line the whelping box for additional comfort.
-
Heating Pad or Heat Lamp
Maintaining a warm environment is essential, especially for newborn puppies who cannot regulate their body temperature. A heating pad or a heat lamp can provide the necessary warmth, but make sure it’s set up to avoid direct contact with the puppies and mother.
-
Digital Thermometer
To monitor the mother’s temperature leading up to labour, which can indicate when birth is imminent. A drop in body temperature is a common sign of labour starting within 24 hours.
-
Disposable Gloves
These are essential for hygiene. Wearing gloves during the delivery helps prevent the spread of infection and allows you to assist with the birth if necessary without introducing contaminants. You also don’t want to be touching anything else with dirty hands, so you may need to use multiple pairs of gloves if you have to operate your phone or move around any other items. Thankfully, a box of gloves is cheap and easy to come by.
-
Antiseptic Solution and Hand Sanitizer
Keeping your hands and the environment clean is crucial. An antiseptic solution can be used for cleaning any instruments or areas around the whelping box, while hand sanitizer should be used before and after assisting with the delivery.
-
Sterile Scissors and Dental Floss
In some cases, you may need to cut the umbilical cords. Sterile scissors are necessary for this task, and unwaxed dental floss can be used to tie off the cords before cutting to prevent bleeding.
-
Aspiration Bulb or Decongestant Syringe
To clear the puppies’ airways of mucus or fluids immediately after birth. It’s crucial for helping puppies who aren’t breathing well on their own initially.
-
Iodine Solution
After cutting the umbilical cord, applying iodine to the end helps prevent infection in the newborn puppy.
-
Puppy Feeding Kit
Includes bottles and appropriate puppy formula in case the mother is unable to nurse her puppies immediately or if there are rejected or weak puppies that need supplementary feeding.
Preparation and Storage Instructions
Organising the Kit
Arrange your whelping kit in order of likely usage. Items needed first, like gloves and towels, should be at the top or in the most accessible part of your storage container.
Storage
Keep the whelping kit in a clean, dry place that’s easily accessible during the whelping process. A portable, waterproof container with compartments can be ideal for quick access and organisation. It’s best to keep the kit in the same room where your dog will be staying, just so you don’t have to go looking for your kit once the time comes.
Preparation
Check and restock your kit well before the expected birthing date. Make sure all consumables are within their expiration date and that reusable items are clean and functional.
Troubleshooting Tips for Common Whelping Challenges
During the birthing process, several issues might arise that require immediate attention. Here are some troubleshooting tips for the most common challenges:
Stuck Puppy
If a puppy seems stuck, first ensure the mother is comfortable and not stressed. Wearing your disposable gloves, you can gently assist by providing mild traction on the puppy with a clean towel. If the puppy does not come free with gentle assistance, call your veterinarian immediately.
Weak Contractions
If the mother dog’s contractions seem weak and she’s having trouble delivering the puppies, a warm, sugar-water solution can help boost her energy. If there’s no improvement, it’s critical to contact your veterinarian, as she may need medication to strengthen contractions or even a caesarean section.
Non-responsive Puppy
If a puppy is not breathing or is too weak to nurse, stay calm. Use the decongestant syringe to clear its airways gently. Rubbing the puppy briskly with a towel can also stimulate breathing. If these methods don’t work, performing a safe puppy CPR and rushing the puppy to a vet is your next step.
Extra Useful Items
While the essentials will cover most situations, having a few additional items on hand can be beneficial:
- Nutritional Supplements for the Mother: Providing the mother with high-energy supplements or a high-calorie diet a few weeks before and after birth can help maintain her strength and improve milk production.
- Puppy Scale: To monitor the puppies’ weight daily, ensuring they are gaining weight and developing healthily.
- Record Keeping Materials: Keeping detailed records of each puppy’s birth time, weight at birth, and daily progress can be crucial, especially in large litters.
Conclusion
Preparing a comprehensive whelping kit and knowing how to use each item effectively can make the whelping easier not only on you, but also on your dog. The peace of mind that comes with knowing that you’re equipped with the right tools can be invaluable.
Remember, while a well-stocked whelping kit is crucial, nothing replaces the expertise of a qualified veterinarian during emergencies. Always have your vet’s number handy, and don’t hesitate to call if the situation becomes too difficult.
FAQs: Comprehensive List of Essential Whelping Kit Items
What is a whelping kit and why is it important?
A whelping kit is a collection of essential items needed to assist a dog during labor and the first few weeks of her puppies’ lives. It is crucial because it helps ensure the health and safety of both the mother and her puppies by providing the necessary tools and supplies to manage the birthing process and immediate postpartum care.
What are the most essential items to include in a whelping kit?
Key items to include in a whelping kit are:
- Whelping box: A clean, safe space for the mother to give birth.
- Clean towels: For drying the puppies and keeping the whelping area clean.
- Disposable gloves: To maintain hygiene during the birthing process.
- Scissors and umbilical clamps: For cutting and securing the umbilical cord.
- Bulb syringe: To clear mucus from the puppies’ airways.
How can I prepare for potential emergencies during whelping?
To prepare for emergencies, you should have:
- Contact information for a vet: In case of complications during birth.
- Puppy milk replacer and bottles: If the mother is unable to nurse.
- Heat source: Such as a heating pad or heat lamp to keep the puppies warm.
- Antiseptic solution: For cleaning any wounds or the umbilical cord area.
- Emergency medical supplies: Including a thermometer, stethoscope, and sterile gauze pads.
What items are necessary for post-whelping care?
For post-whelping care, you will need:
- Puppy scales: To monitor the puppies’ weight gain.
- Puppy ID collars: To identify and keep track of each puppy.
- High-quality puppy food: For when they start weaning.
- Cleaning supplies: Such as disinfectant and puppy pads to maintain a clean environment.
- Record-keeping materials: To document each puppy’s health and progress.
How often should I check on the puppies and mother after birth?
After birth, it is important to check on the puppies and mother frequently:
- First 24 hours: Monitor closely for signs of distress or complications.
- First week: Check every few hours to ensure the puppies are nursing well and gaining weight.
- After the first week: Regular checks multiple times a day to ensure continued health and proper development.
- Ongoing: Maintain a routine of daily health checks and keep the whelping area clean and comfortable.
We appreciate you for taking the time to read this article!
Finally, we hope you found this article interesting? And what do you think about ”Comprehensive List of Essential Whelping Kit Items!?”
Please feel free to share or inform your friends about this article and this site, thanks!
And let us know if you observe something that isn’t quite right.
Dogs
Understanding and Addressing Separation Anxiety in Dogs
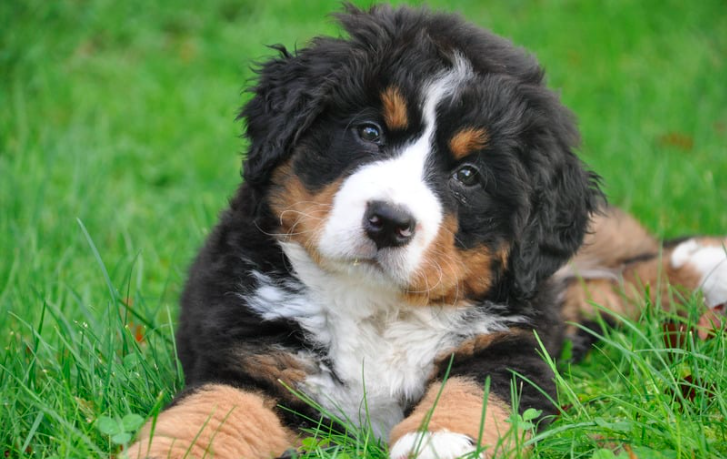
Understanding and Addressing Separation Anxiety in Dogs
What is Separation Anxiety?
Separation anxiety is a common behavioral issue in dogs characterized by distress or anxiety when they are separated from their owners or left alone. This condition can manifest in various ways, including excessive barking, destructive behavior, pacing, panting, or even attempts to escape.
Causes of Separation Anxiety
Several factors can contribute to the development of separation anxiety in dogs, including:
- Past Trauma: Dogs that have experienced abandonment, neglect, or traumatic events in the past may be more prone to separation anxiety.
- Change in Routine: Changes in the dog’s routine or environment, such as moving to a new home or the absence of a family member, can trigger separation anxiety.
- Lack of Socialization: Dogs that have not been properly socialized or have not learned to cope with being alone may develop separation anxiety.
- Overdependence on the Owner: Dogs that are overly dependent on their owners for companionship and reassurance may struggle to cope with being alone.
Signs of Separation Anxiety
Recognizing the signs of separation anxiety is crucial for early intervention. Common signs include:
- Excessive barking or howling when left alone
- Destructive behavior, such as chewing furniture or scratching doors
- Pacing, restlessness, or excessive panting
- Urination or defecation inside the house, even if the dog is house-trained
- Attempts to escape or self-injury when confined
Tips for Helping Dogs Cope with Separation Anxiety
- Gradual Desensitization: Gradually acclimate your dog to being alone by leaving for short periods and gradually increasing the duration over time. Use positive reinforcement techniques, such as treats or toys, to create positive associations with alone time.
- Provide Enrichment: Keep your dog mentally and physically stimulated by providing interactive toys, puzzle feeders, or engaging in regular exercise. This can help alleviate boredom and anxiety.
- Create a Safe Space: Designate a comfortable and secure space for your dog to retreat to when you’re not home. This could be a crate, a cozy corner with their bed, or a room with their favorite toys.
- Establish a Routine: Stick to a consistent daily routine to provide structure and predictability for your dog. This can help reduce anxiety and create a sense of security.
- Seek Professional Help: If your dog’s separation anxiety persists despite your efforts, consider seeking guidance from a veterinarian or a certified animal behaviorist. They can provide personalized advice and assistance tailored to your dog’s specific needs.
Conclusion
Separation anxiety can be a challenging issue for both dogs and their owners, but with patience, understanding, and proactive intervention, it is possible to help your dog overcome their anxiety and lead a happier, more balanced life.
By recognizing the signs of separation anxiety, implementing positive reinforcement techniques, and seeking professional guidance when needed, you can support your dog in coping with being alone and strengthen your bond in the process.
FAQs (Frequently Asked Questions)
Can separation anxiety in dogs be cured?
While separation anxiety in dogs can be managed and improved with proper training and intervention, it may not be entirely cured in all cases. However, with patience, consistency, and appropriate support, many dogs can learn to cope better with being alone.
How long does it take to train a dog with separation anxiety?
The time it takes to train a dog with separation anxiety can vary depending on the severity of the anxiety, the dog’s temperament, and the effectiveness of the training methods used. Some dogs may show improvement within a few weeks, while others may require months of consistent training and behavior modification.
Are there medications available to treat separation anxiety in dogs?
In some cases, veterinarians may prescribe medications, such as anti-anxiety medications or antidepressants, to help manage severe cases of separation anxiety in dogs. These medications are typically used in conjunction with behavior modification techniques and should only be prescribed under the guidance of a veterinarian.
Can hiring a pet sitter or dog walker help with separation anxiety?
Hiring a pet sitter or dog walker can be beneficial for dogs with separation anxiety as it provides them with companionship and breaks up their time alone. However, it’s essential to ensure that the pet sitter or dog walker is experienced in handling dogs with separation anxiety and follows any specific instructions or routines provided by the owner.
Can older dogs develop separation anxiety?
Yes, older dogs can develop separation anxiety, particularly if they experience changes in their environment or routine, such as the loss of a companion or a change in living arrangements. It’s essential to monitor older dogs for signs of anxiety and provide appropriate support and intervention when needed.
-
 Pet Care2 years ago
The Best Dog Collars For 2022
-
 Dogs2 years ago
Bichon Frise: The Happy, Playful, and Cuddly Companion
-
 Trending Pet Stories1 year ago
2023 ‘World’s Ugliest Dog’ Winner: Scooter’s Tale of Resilience
-

 Animals2 years ago
Are There Animals Having Down Syndrome?
-

 Pets2 years ago
The Fascinating World Of The Red Chameleon
-
 Dogs2 years ago
Top 10 Most Popular Dog Breeds According To AKC.
-
 Dogs2 years ago
21 Dog Breeds That Resemble Bears Or Teddy Bears!
-
 Dogs2 years ago
Eskimo Dogs from Canada – What Are They? – Find Out!
